在本教程中,我们将向您展示如何在 AlmaLinux 8 上安装 Redmine。对于那些不知道的人,Redmine 是一个跨平台和跨数据库的灵活项目管理 Web 应用程序。 Redmine 包括对多个项目、wiki、问题跟踪系统、论坛、日历、电子邮件通知等的支持。
本文假设您至少具有 Linux 的基本知识,知道如何使用 shell,并且最重要的是,您在自己的 VPS 上托管您的站点。 安装非常简单,假设您在 root 帐户中运行,否则您可能需要添加 ‘sudo‘ 获取 root 权限的命令。 我将向您展示如何在 AlmaLinux 8 上逐步安装 Redmine 开源项目管理软件。您可以按照 CentOS 和 Rocky Linux 的相同说明进行操作。
在 AlmaLinux 8 上安装 Redmine
步骤 1. 首先,让我们先确保您的系统是最新的。
sudo dnf update sudo dnf install epel-release sudo dnf config-manager --set-enabled powertools
步骤 2. 安装所需的依赖项。
现在运行以下命令将依赖项安装到您的系统:
sudo dnf install ruby ruby-devel rpm-build wget libxml2-devel vim make openssl-devel automake libtool ImageMagick ImageMagick-devel MariaDB-devel gcc httpd-devel libcurl-devel gcc-c++
步骤 3. 创建新的系统用户。
使用主目录创建一个新用户和组 /opt/redmine 这将运行Redmine:
useradd -r -m -d /opt/redmine redmine
步骤 4. 安装 Apache 在 AlmaLinux 8 上。
运行以下命令安装 Apache 网络服务器:
sudo dnf install httpd httpd-tools
一旦安装 Apache 系统上的服务,启动所有必需的服务:
sudo systemctl enable httpd sudo systemctl start httpd sudo systemctl status httpd
接下来,由于我们将使用 Apache 作为我们的 HTTP 服务器,添加 Apache 到 Redmine 组:
usermod -aG redmine apache
步骤 5. 在 AlmaLinux 8 上安装 MariaDB。
MariaDB 是一种流行的数据库服务器。 安装很简单,只需要几个步骤,如图所示:
sudo dnf install mariadb-server mariadb
安装完成后,开始使用以下命令使其在系统启动时启动:
sudo systemctl restart mariadb sudo systemctl status mariadb sudo systemctl enable mariadb
默认情况下,MariaDB 未加固。 您可以使用以下方法保护 MariaDB mysql_secure_installation 脚本。 您应该仔细阅读以下每个步骤,这些步骤将设置 root 密码、删除匿名用户、禁止远程 root 登录以及删除测试数据库和访问安全 MariaDB 的权限:
mysql_secure_installation
像这样配置它:
- Set root password? [Y/n] y - Remove anonymous users? [Y/n] y - Disallow root login remotely? [Y/n] y - Remove test database and access to it? [Y/n] y - Reload privilege tables now? [Y/n] y
要登录 MariaDB,请使用以下命令(请注意,它与您用于登录 MariaDB 数据库的命令相同):
mysql -u root -p
在 MariaDB shell 执行以下命令,为 Redmine 软件创建数据库和用户。
MariaDB [(none)]> create database redminedb; MariaDB [(none)]> grant all on redminedb.* to [email protected] identified by 'your-strong-password'; MariaDB [(none)]> flush privileges; MariaDB [(none)]> quit
步骤 6. 在 AlmaLinux 8 上安装 Redmine。
现在我们从官方页面下载最新版本的Redmine:
wget https://www.redmine.org/releases/redmine-4.2.2.tar.gz -P /tmp
之后,将 Redmine tarball 解压缩到 Redmine 用户的主目录:
sudo -u redmine tar xzf /tmp/redmine-4.2.2.tar.gz -C /opt/redmine/ --strip-components=1
步骤 7. 配置 Redmine 数据库。
首先切换到Redmine的用户账号:
su - redmine
重命名示例 Redmine 配置:
cp config/configuration.yml{.example,}
重命名 public 文件夹下的示例调度 CGI 配置文件:
cp public/dispatch.fcgi{.example,}
将示例重命名为数据库配置文件:
cp config/database.yml{.example,}
接下来,打开数据库配置文件:
nano config/database.yml
添加以下文件:
... production: adapter: mysql2 database: redminedb host: localhost username: redmineadmin password: "your-strong-password" # Use "utf8" instead of "utfmb4" for MySQL prior to 5.7.7 encoding: utf8mb4 ...
步骤 7. 安装 Ruby 依赖项。
切换到 Redmine 用户并安装 Ruby 依赖项:
su - redmine
接下来,安装用于管理 gem 依赖项的 Bundler:
gem install bundler bundle config set --local without 'development test' bundle install
步骤 8. 生成密钥并迁移数据库。
为了防止对存储会话数据的 cookie 进行调整,您需要生成一个 Rails 用来对它们进行编码的随机密钥:
bundle exec rake generate_secret_token RAILS_ENV=production bundle exec rake db:migrate
数据库迁移完成后,将默认配置数据插入数据库:
RAILS_ENV=production REDMINE_LANG=en bundle exec rake redmine:load_default_data
然后,配置文件系统权限:
for i in tmp tmp/pdf public/plugin_assets; do [ -d $i ] || mkdir -p $i; done chown -R redmine:redmine files log tmp public/plugin_assets chmod -R 755 /opt/redmine/
步骤 9. 配置防火墙。
使用以下命令打开必要的端口:
sudo firewall-cmd --add-port=3000/tcp --permanent sudo firewall-cmd --reload
步骤 10. 配置 Apache 对于Redmine。
切换到上面创建的 Redmine 用户以安装 Phusion Passenger Apache 模块:
su - redmine gem install passenger --no-rdoc --no-ri
然后,安装乘客 Apache 模块使用以下命令:
passenger-install-apache2-module
接下来,创建一个 Apache 使用 nano 文本编辑器的模块配置文件:
nano/etc/httpd/conf.modules.d/00-passenger.conf
添加以下文件:
LoadModule passenger_module /opt/redmin/.gem/ruby/gems/passenger-6.0.10/buildout/apache2/mod_passenger.so <IfModule mod_passenger.c> PassengerRoot /opt/redmine/.gem/ruby/gems/passenger-6.0.10 PassengerDefaultRuby /usr/bin/ruby </IfModule>
然后,创建一个 Apache 配置文件:
nano/etc/httpd/conf.d/redmine.conf
添加以下文件:
Listen 3000 <IfModule mod_passenger.c> PassengerRoot /opt/redmin/.gem/ruby/gems/passenger-6.0.10 PassengerDefaultRuby /usr/bin/ruby </IfModule> <VirtualHost *:3000> ServerName redmine.idroot.us DocumentRoot "/opt/redmine/public" CustomLog logs/redmine_access.log combined ErrorLog logs/redmine_error_log LogLevel warn <Directory "/opt/redmine/public"> Options Indexes ExecCGI FollowSymLinks Require all granted AllowOverride all </Directory> </VirtualHost>
验证 Apache 通过执行以下命令进行配置:
httpd -t sudo systemctl restart httpd
最后,在您的 Linux 服务器上禁用 SELinux:
setenforce 0 sed -i 's/=enforcing/=disabled/' /etc/selinux/config
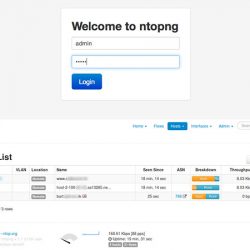
步骤 11. 访问 Redmine Web 界面。
安装成功后,现在通过浏览器使用地址访问Redmine Web界面, https://redmine.idroot.us:3000.
Redmine 的默认登录凭据是:
- 用户名: admin
- 密码: admin
恭喜! 您已成功安装 Redmine。 感谢您使用本教程在您的 AlmaLinux 8 系统上安装 Redmine 开源项目管理应用程序。 如需更多帮助或有用信息,我们建议您查看 Redmine官方网站.